Step by step guide: How to implement a Mega Man 2 style jump in Godot Engine (Sustained jump)
In this guide we will talk about how to implement a jump depending on the time the user presses the jump action in Godot Engine. I will divide this tutorial into 2 parts, the character setup section and the scene and code.
Table of contents
Character and scene configuration
- First let's open Godot Engine and set up our test scene.
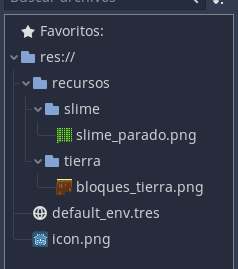
- We import our assets and create a folder as shown in the image, this is done to have a better order in our project, in my case I have some assets that I made myself, but I can leave a link here so you can download some assets for free use.
- Link for character: Character
- Link of ground: Tileset of ground
- We are going to generate 2 scenes, this serves to organize the resources and not to have disordered the project, it is advisable to name the scenes with a prefix that you know and those of your team know that means each prefix, in my case I will name it of the following form:
- For the scene: en_[scene name].
- for code: gs_[godot script name].
- We are going to add a node of type Node2D in our scene of es_slime, I do this because I like to structure this way the assets because if we put more nodes to our character, we are going to want that this well structured in relation to our nodes.

- Then we will add another node of type AnimatedSprite, this will serve to place our character.

- In the property inspector we create a new Sprite Frame and open it by double clicking on the created sprite frame.

- A panel will be opened at the bottom.

- We will click on the add frames button to import our SpriteSheet, it is important to do it this way to avoid problems later, also in case you don't have a sprite sheet you can simply drag and drop your image.

- It will open a panel with our image and we must place the division that we have in our SpriteSheet, in my case it is 64px high by 64px wide.

- Click and hold to select the images to be imported into your animation and then click on add frames.

- Then we will add a KinematicBody2D to the node tree, the KinematicBody2D is used to apply physics to our character.

- Drag and drop our AnimatedSprite into the KinematicBody2D.

- We add a new node to our KinematicBody2D of type CollisionShape2D, this node is used so that our character can collide with objects.

- In the property inspector we will add a CapsuleShape, you can add the one that best suits you and ready, we would have our character configured for the moment.

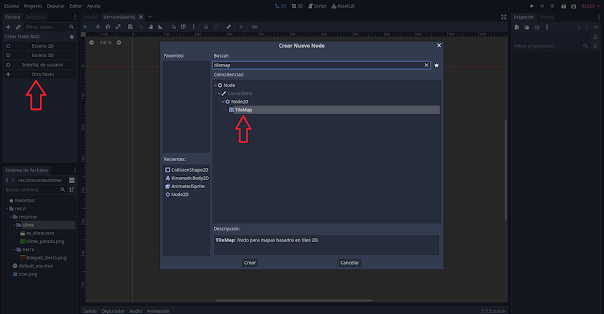
- Now we proceed to configure our TileMap, we open the es_tierra scene and add another node of type TileMap.
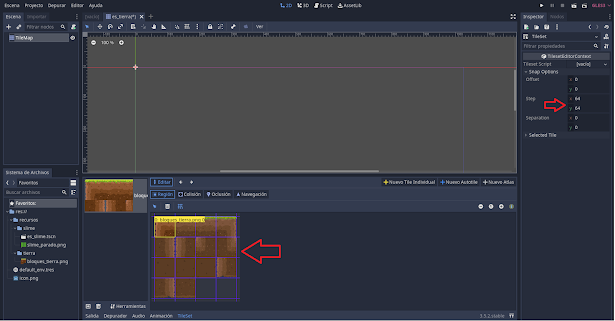
- In our properties panel we add a new TileSet.

- A panel will open at the bottom and we will add a texture to be able to paint in our game.

- Then click on new individual file.
- After adding a New Individual Tile select a block and split the cell depending on the need of your TileSet, in my case it is 64px wide by 64px high.
- Add a collision to each block individually with the Collision button.
- It will look as follows:

- When you select the TileMap Node a panel will appear with the individual tiles you created, this will be used for drawing in the game.

- I will draw a small scenario to test.

- We go to the main scene, add a node of type Node2D and add child scenes.

- The level will be as follows.

Code
- We open again the scene of our character and add a new script with Kinematic2D selected to our scene.

- Before we start programming, let's map our keys to generate the action in the project configuration.

- Go to the Input Map tab.
- We will add 3 actions:
- mover_derecha
- mover_izquierda
- saltar
- Now you will write the following code and test your game to check that everything is correct.
extends KinematicBody2D

# Public variables to the editor
export (int) var velocidadh: int = 200
export (int) var maxVelocidadh: int = 40
export (int) var velocidadCorrerh: int = 25
export (int) var gravedad: int = 10

export (int) var fuerza_salto: int = 400
export (int) var multiplicador_caida = 2
export (int) var fuerza_salto_pequeno_multiplicador = 20
# Defined movement vector
var movimiento: Vector2 = Vector2.ZERO

func entradas():
    # physics of movement
    var direccion = int(Input.is_action_pressed("mover_derecha")) - int(Input.is_action_pressed("mover_izquierda"))
    movimiento.x = direccion * velocidadh

    movimiento.y += gravedad
    # physics of jump
    # player is falling
    if movimiento.y > 0:
        movimiento += Vector2.UP * (-9.81) * (multiplicador_caida)
    elif movimiento.y < 0 and Input.is_action_just_released("saltar"):
    	# Cancel jump if released
        movimiento += Vector2.UP * (-9.81) * (fuerza_salto_pequeno_multiplicador)

    # normal jump
    if Input.is_action_pressed("saltar") and is_on_floor():
        movimiento = Vector2.UP * fuerza_salto


# warning-ignore:unused_argument
func _physics_process(delta):
    entradas()
    movimiento = move_and_slide(movimiento, Vector2.UP)
Important that in the "elif" part the action during input execution is "Input.is_action_just_released".
I hope you found this information on how to implement a Mega Man 2-style sustained jump in Godot Engine useful! With these techniques, you'll be able to add a touch of authenticity to your video game projects and create exciting jumping experiences for your characters - feel free to explore and experiment with different variations and settings to achieve the desired effect!
Remember that practice and patience are key in game development - have fun while immersing yourself in the fascinating world of Godot Engine and create your own jumping masterpieces! If you have any questions or want to share your achievements, feel free to leave your comments - see you in future posts full of tips and tricks to keep improving your game development skills!


Comentarios
Publicar un comentario